Translations:WiFi Connection/9/en
Jump to navigation
Jump to search
- Download and install MyPublicWiFi software, an assistant which will enable the creation of the HotSpot.
- Once successfully installed, open the application. You will see the main configuration page.
- In this page, select “WLAN Hotspot” tab and set the following options:
- Network Access: Router Mode (NAT)
- Internet Connection: WiFi (0.0.0.0)
- Network name (SSID): arisWiFi (can be anything else)
- Network key: arisnetwork (can be anything else)
- When finished, click the “Start Hotspot” button. In case of success, the IP address in which the HotSpot is running will be shown, alongside with the previously configured name of the network. At this point, nearby devices will be capable of connecting to the “arisWiFi” by selecting this network and introducing the key.

Setting the HotSpot configuration. - Find the 'C:\Users\Public folder and open the ARIS\Frontend\build\server_ip.txt' file.
- Copy the IP address where the HotSpot is running (192.168.5.1 in the example) into this file, removing the previous content.
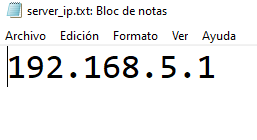
Editing server_ip.txt - Save the changes and close the file.

