MobileApp:Using ARIS Bluetooth functionality
Before using Bluetooth functionality, it must first be properly configured. Notice that such configuration must be done in a coordinated way by using both System Administrator and Laboratory Supervisor user roles.
Creating a request with an automatic test[edit]
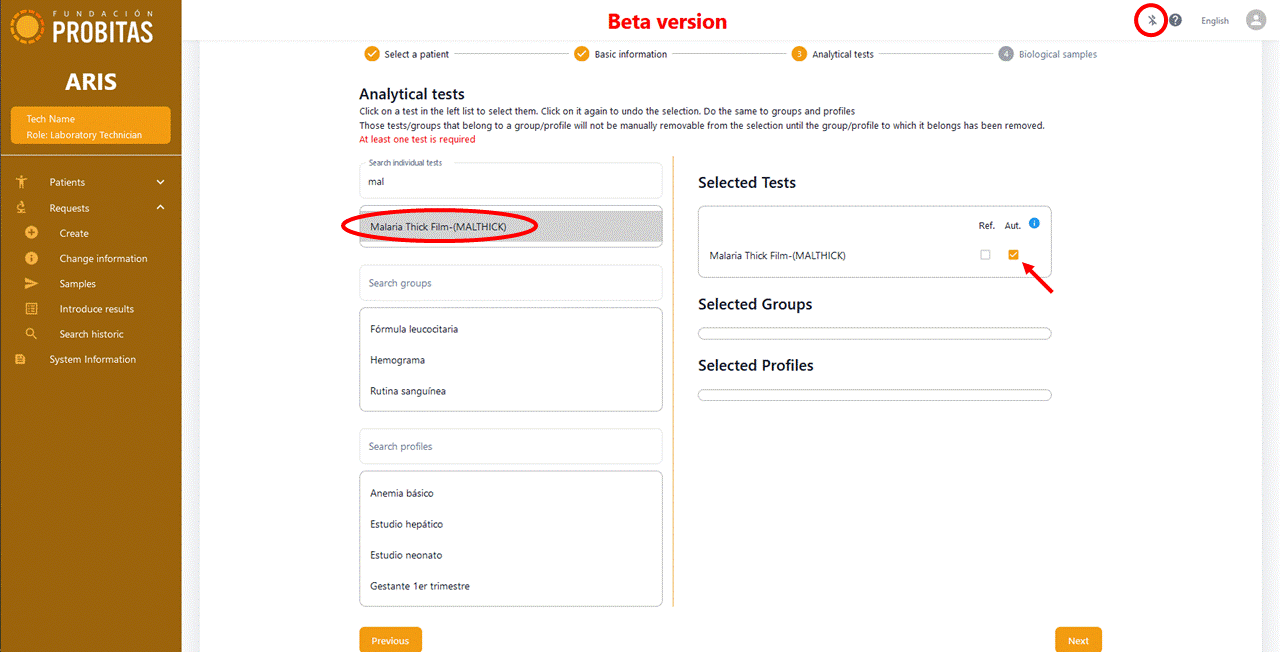
Once the System Administrator has enabled the Bluetooth functionality, and the Laboratory Supervisor has created an automatic kind of test (e.g., for Malaria), the Laboratory Technician can freely choose this in any request. Notice that a kind of test being declared to be automatic, just means that this option is enabled. However, the Laboratory Technician can still disable it for any concrete request. If disabled, the test becomes a regular one and its result must be manually provided.
It is important to notice that for the automatic test to work, the corresponding pre-trained neural network should have been made available in the Internet and downloaded in the ARIS instance.
Downloading and analyzing images[edit]
The automatic analysis of images by means of artificial intelligence requires the interaction of the Mobile App and ARIS, as shown in the video under these lines. First of all the mobile and the computer hosting ARIS must have been paired, and ARIS properly configured. Then, the mobile app should download the worklist from ARIS by clicking the button NEW WORKLIST, and choosing the right Bluetooth device (i.e., DESKTOP-RJEMUQ2 in the video, but this identifier will change from one computer to another). Notice that this is completely transparent to ARIS graphical interface and its user should not notice that the worklist is being trasferred to the mobile. Nevertheless, ARIS should still be up and running, and its Bluetooth functionality enabled to be able to send the corresponding information in the background. In the video, we see that only one test (i.e., 231016R000101) is in the list, but in general, there could be many.
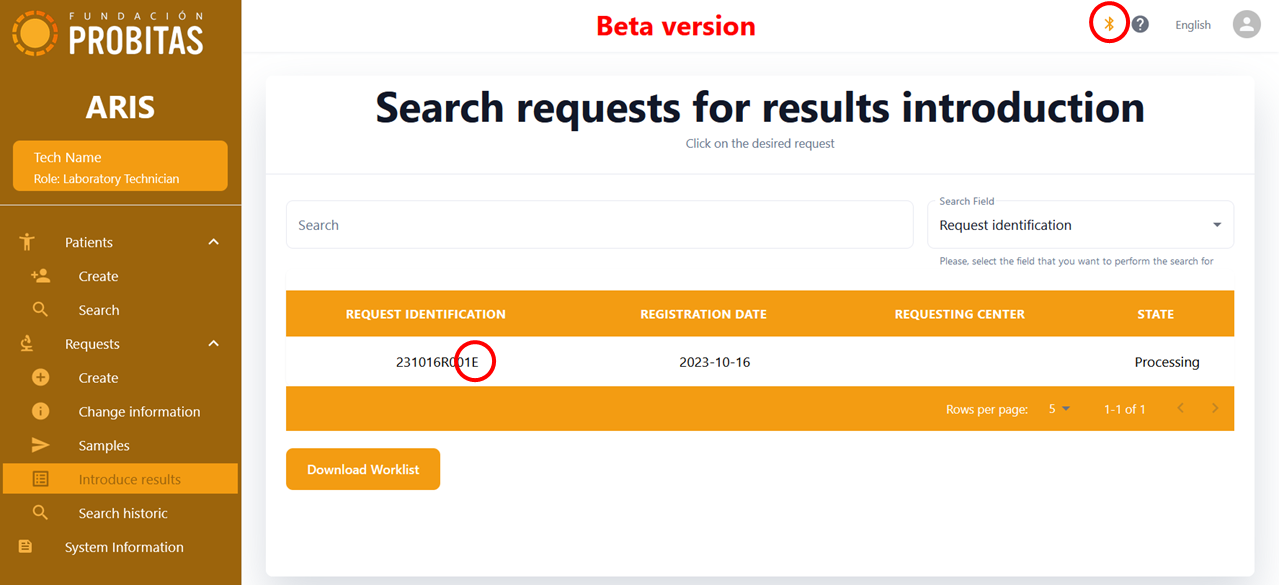
Next step is to use the mobile phone to take the images. This can be done immediately after downloading a worklist, but also if the worklist was downloaded previously (use the SAVED WORKLIST button in this case). In any case, we should choose the test to perform from the available worklist. As before, in this video, we see only one test, but in general we will see many. To avoid mistakes, the mobile app will require a control letter to proceed (i.e., "E" in the video). This letter should have been previously annotated in the slide together with the corresponding request identifier, and can be obtained at anytime from ARIS (see the red circle in the image).
The next screen in the mobile app allows to choose the scanning mode, which is MANUAL in the case of the video. Thus, the laboratory technician should focus the image and press the button to take as many pictures as desired. Alternatively, AUTOMATIC mode can be chosen (see shorter video), which automatically moves the slide and focuses the microscope. Notice that the control letter in this case is different, since the test identifier is also another one.
In either one mode or another, during the process, a low quality and quick image analysis is made, whose results are interactively shown in the screen of the mobile. When satisfied, they should press SAVE to indicate that the analysis of the current sample is over. This action will keep all the taken images in the mobile.
However, in order to perform a more reliable analysis and persist the results, the images should be sent to ARIS by clicking the SYNC ARIS button in the main screen of the mobile app. ARIS user will not be interrupted, however, this action can affect performace and generate some interferences in the queries if concurrently working over the same requests. Thus, the process is appropriately signaled in the top right corner of the ARIS screen. In the video, only one image is transferred, but in general, many can be downloaded to ARIS at once in the same synchronization process. Actually all those saved in the mobile app since the last synchronization will be downloaded in a single batch. Just notice that the more images have to be transferred, the longer the process will take.
During the downloading and analysis, ARIS user can see the status of the process just clicking on the dropdown arrow next to the circling icon. This will show a list of all downloaded images whose analysis did not finish, yet. Once the analysis of an image is over, the result of the corresponding test is written to the database. If the result is positive, an exemplary image is also stored and can be seen in the corresponding ARIS screen by both laboratoty technitians and supervisors. Since this may generate some space problem in the computer hosting ARIS, an automatic purging mechanism is in place. The amount of images kept is configured in the corresponding system parameter. When the limit is surpassed, older images are automatically deleted at start up time.
Manually introducing values in an automatic test[edit]
Any test that has been defined as automatic can be redefined as not. Both Laboratory Technician before introducing results or the Laboratory Supervisor once introduced, on validating them, can do this. When the corresponding tick is removed, the test does not accept images anymore, and its results can be introduced manually as for any other test.

